The Saskatchewan Science Centre Online! Check out our hilarious and educational web series “SSCTV”, find downloadable resources, explore other cool science links, and tune into the live BUBOCam!

Science At Home - Water Lifting Candle
Learn how heat and pressure interact to do something that you might think is impossible!
Hey Science Fans!
Here’s another great activity that you can do at home to amaze your friends and family (and explore learning with your kids!)
Instructions
WATER LIFTING CANDLE DEMONSTRATION
Here’s what you’ll need:
Pan, plate, or flat-bottomed dish
Water (add food coloring to make the effect even more visible)
Tea light or small candle
Matches or lighter
Tall glass cylinder, drinking glass, vase, etc
Warning! This activity uses fire. Make sure there is an adult present to help!
What you do
Pour some water (colored water is best) into a shallow dish or pan
Place a candle into the dish
Carefully light the candle
Place the glass upside down over the candle.
Watch as the candle goes out. What happens to the water?
What’s happening?
The “Fire Triangle” outlines the three things required for fire to be present: oxygen, fuel, and heat. When one of those items is missing, a fire can not start. If one of those resources is used up, the fire will go out. By placing the glass over the candle, you limit the amount of oxygen available to the fire. When the oxygen in the glass is used up, the candle goes out.
The flame of the candle creates heat which warms the air inside the glass. As the air inside the glass warms, it expands - you probably noticed some air bubble leaking out from under the glass while the candle was burning. When the candle goes out, the air in the glass cools. As the air cools, it contracts. This creates an area of low pressure inside the glass - a partial vacuum. The air pressure outside the glass remains constant, pushing down on the water in the dish.
The area of high pressure (atmospheric pressure) pushes down on the liquid in the dish, forcing it to go into an area of lower pressure (the space inside the glass). When that happens, the water level inside the glass will rise higher than the water level outside the glass. When the air pressure inside the glass and outside the glass are equal, the water level stops rising.
Experiment!
Does the size or shape of the glass make a difference?
Does the temperature of the glass have an effect on the outcome?
Does the amount of water in the dish have an effect on the outcome?

Build A Compass Activity
A compass is a navigation tool that shows direction (north, south, east, or west). They have been used for many years by people trying to find their way. In this activity, you will get to make a compass and explore why they need magnets to work.
Build a Compass
A compass is a navigation tool that shows direction (north, south, east, or west). They have been used for many years by people trying to find their way. In this activity, you will get to make a compass and explore why they need magnets to work.
Activity Type:
Hands on activity, experiment
Suggested Age:
6 to 9 years old
What you need:
Sewing needle
Small bar magnet
Piece of cork or Styrofoam disk
Bowl of water
Nail polish
Tape
What you do:
Paint one end of the needle with a dab of nail polish.
Run the south pole of a magnet over the needle from the unmarked end to the marked end about 50 times. Be sure to lift the magnet each time and always move in the same direction. This action magnetizes the needle.
Put the needle on the Styrofoam disk or small piece of cork. Add a small piece of tape to secure it. Or stick the needle through the Styrofoam.
Float the Styrofoam disk in a bowl of water.
Watch what is happening to your compass. The needle should come to point towards the nearest magnetic pole — north or south as the case may be.
Test this by using a compass. Don’t have a compass? Use the app on your mobile device.
Explanation:
The earth produces a magnetic field. This field, although weak, is sufficient to align iron and other paramagnetic compounds that are within the sewing needle. By floating the needle on the cork, it floats freely, and can orient itself within the Earth’s magnetic field, to point toward the north or south poles of the planet.
History:
During the medieval period, most people navigated using the sky, by the stars, moon, and sun. The introduction of the compass was based on this simple floating compass. As improvements were made in navigation such as Portolan charts, people were better able to navigate, even when the sky was cloudy. This allowed for more travel, especially sea travel, during all seasons.
Taking it further:
Why did the magnet have that effect on the pin? Think about early forms of navigation such as this compass. Do you think it would be difficult to find your way?
Do you have a GPS? Go for a walk using the GPS to navigate your walk. What are the benefit of GPS technology compared to a compass?

Sask Science Centre Online Auction Now Available
The items included in this online auction are all donations from our Fantasy Food event vendors, sponsors, and donors and we wish to take this chance to thank them greatly for their generosity. Funds raised through this auction will directly support our efforts to continue our science literacy and educational programs.
When the Saskatchewan Science Centre closed its doors to the public on March 14th due to concerns over the Covid-19 pandemic we also cancelled our major fundraising event, Fantasy Food.
These were tough decisions, but we are encouraged by the support of our guests, donors, and sponsors, all of whom wanted to assist in continuing the fundraising efforts of the Science Centre. We hope to offer a meaningful way for individuals to support us at this time. Over the next six weeks, we are pleased to present our Online Auction!

Some Sask Science Centre Online Auction Items
The items included are all donations from our Fantasy Food event vendors, sponsors, and donors and we wish to take this chance to thank them greatly for their generosity. Funds raised through this auction will directly support our efforts to continue our science literacy and educational programs.
Details
The online auction will run from April 2 until May 14th, 2020.
Auction Link
Items include art, jewelry, personal care kits, and more!

More Sask Science Centre Auction Items
As non-profit, non-governmental educational organization it is our mission to ignite scientific curiosity in Saskatchewan communities through interactive, dynamic, and engaging opportunities. The skills and lessons learned through science discovery are both tangible and personal in nature. It teaches collaboration, resiliency and creativity – all things so very important to foster in this difficult time.
Thank you once again to our ongoing supporters, and our sponsors, Corporate Members, donors, and vendors.
SSCTV - Solids and Gasses!
Welcome to the latest episode of Sask Science Centre TV! Learn about solids and gasses with SUPER-cool liquid nitrogen demonstrations, explore the element Mercury with Tommy Tungsten, and Sally Science explores magnetic rocks!
The latest episode of SSCTV is now ready for your streaming pleasure!
Welcome to the latest episode of Sask Science Centre TV! Learn about solids and gasses with SUPER-cool liquid nitrogen demonstrations, explore the element Mercury with Tommy Tungsten, and Sally Science explores magnetic rocks! Do you have a question for Sally Science? Send it to rholota@sasksciencecentre.com - include a video if you'd like!

Create Your Very Own Great Horned Owl
Learn all about Great Horned Owls like Bubo! Watch Bubo’s livestream, get instructions for a fun Great Horned Owl downloadable activity, and check out our Great Horned Owl activity book!
Create Your Very Own Great Horned Owl

Using simple supplies found around your home, create Great Horned Owl hand puppets.
What You Need:
Size 10 envelopes (letter size)
Markers
Googly eyes or buttons
Coloured paper
Glue or tape
Scissors
Paint
Paint brushes
Yarn, string, or feathers to make the “horns” of the owl

What You Do:
1. Seal your envelope shut and then cut the envelope in half. Each half of the envelope will become one puppet. The open part will be where your hand goes.

2. Cut out 2 circles from the coloured paper. Cut the circles in half. These will become the wings of your owl. Glue your wings to the envelope.

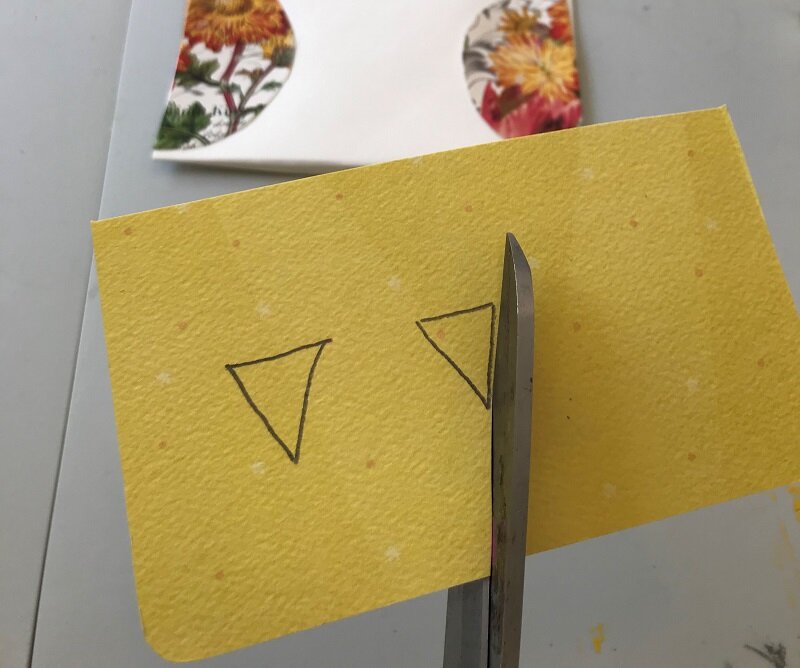
3. Cut out two small triangles from your coloured paper. These will become the beaks of your owl. Glue the beaks onto the envelope. Remember, the open end is the bottom, and the closed end is the top of the owl's head.
4. Add googly eyes to your owl — or use buttons. You can also draw on eyes if you do not have googly eyes.

5. Create the “horns” of your owl by gluing tips of feathers to the corners of the envelope or make a little tuft of yarn and glue those to the corners of your envelope.

6. Decorate your owl puppet with markers, coloured paper, paint or other materials you may have.

7. Place your hand inside the envelope and play with your new owl puppet!
Taking It Further:
Great Horned Owls are one of the most common owls in North America.
Meet Bubo, a Great Horned Owl living at the Saskatchewan Science Centre.
What kind of sounds do owls make? Try to make sounds such as a woot, screech, or click.
Take your owl puppet outside. Where would your owl live? What other animals can make into puppets. Try making another animal puppet, perhaps what an owl might eat.
Downloadable Activities
Download these instructions here.
Download the Great Horned Owl Activity Book here.
Meet Bubo: The Saskatchewan Science Centre’s Great Horned Owl
Bubo is a Great Horned Owl that lives at the Saskatchewan Science Centre!
Bubo was rescued after losing a wing while in the wild. Injured animals like Bubo can not be released back into their natural habitat, so Bubo will live at the SSC for the rest of its life.
Click Here to watch the Bubo live now, and learn more about Bubo and Great Horned Owls!