
The Saskatchewan Science Centre Online! Check out our hilarious and educational web series “SSCTV”, find downloadable resources, explore other cool science links, and tune into the live BUBOCam!

Straw Pan Pipes
There is science in music! Create a musical instrument with some simple household items and learn about sounds, vibrations, and pitch.
There is science in music! Create a musical instrument with some simple household items and learn about sounds, vibrations, and pitch.
What You Need:
Ruler
Scissors
Straws
Markers
Tape

Preparation:
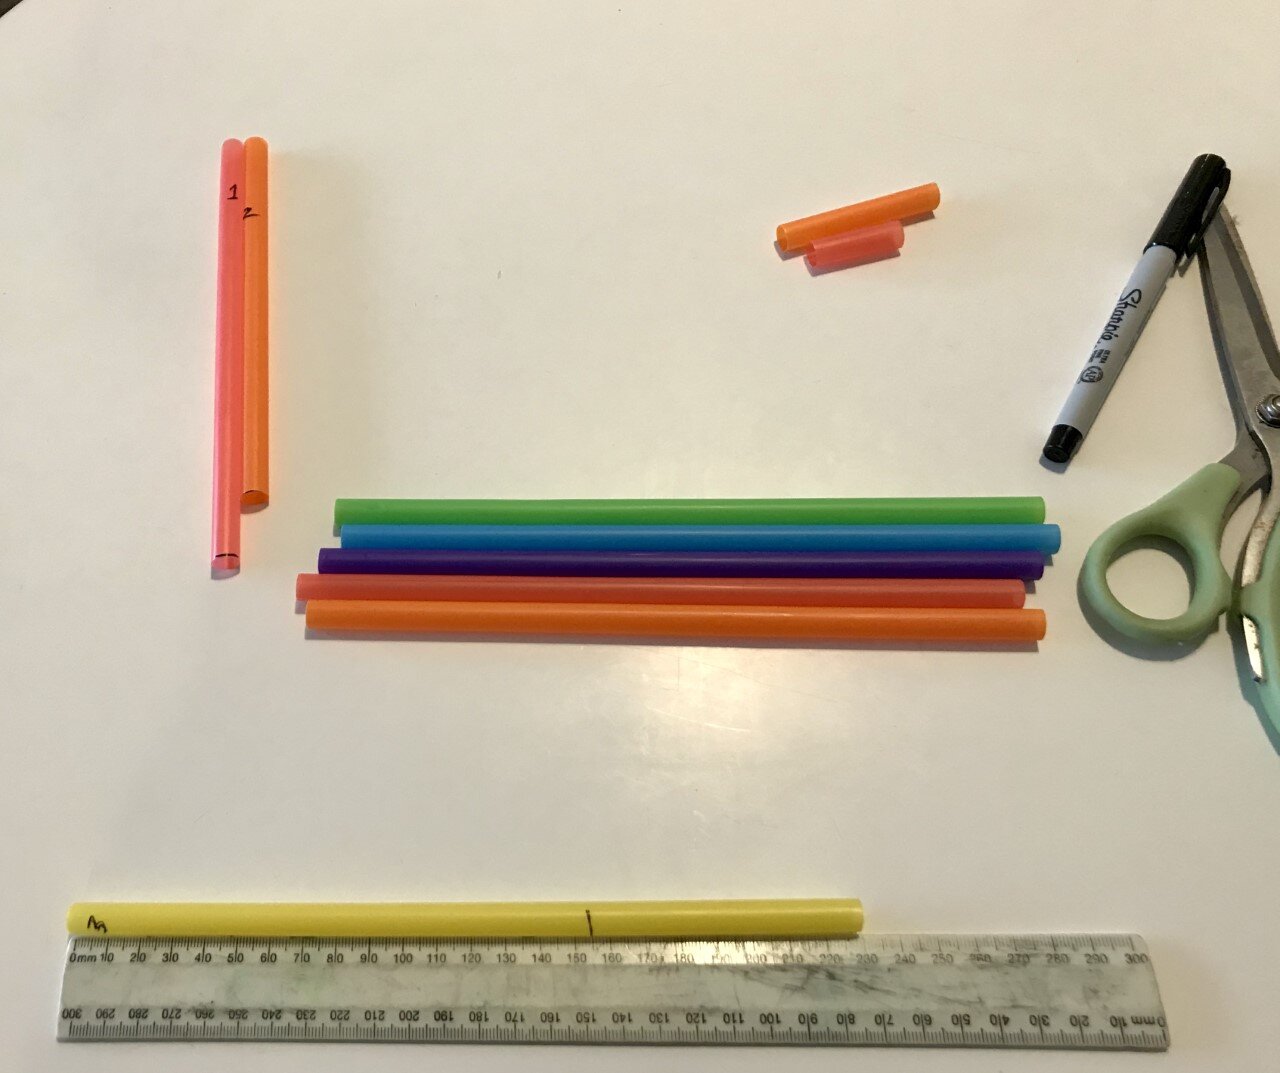
Measure and cut the straws so that you have one straw in each of the following lengths:

Measure and cut the straws.
Straw # 1: 19.5 cm (most straws are this length, but it is best to measure to be sure!)
Straw # 2: 17 cm
Straw # 3: 15.5 cm
Straw # 4: 14.5 cm
Straw # 5: 13 cm
Straw # 6: 11.5 cm
Straw # 7: 10 cm
Straw # 8: 9.5 cm

· Straw # 1: 19.5 cm

Straw # 2: 17 cm
Straw # 3: 15.5 cm

Straw # 4: 14.5 cm

Straw # 5: 13 cm

Straw # 6: 11.5 cm

Straw # 7: 10 cm

Straw # 8: 9.5 cm
Save the ends that you cut off to use for spacers when you build you pan pipes.
What you do:
Arrange all the straws in order, longest to shortest, with the tops of them all at the same level.
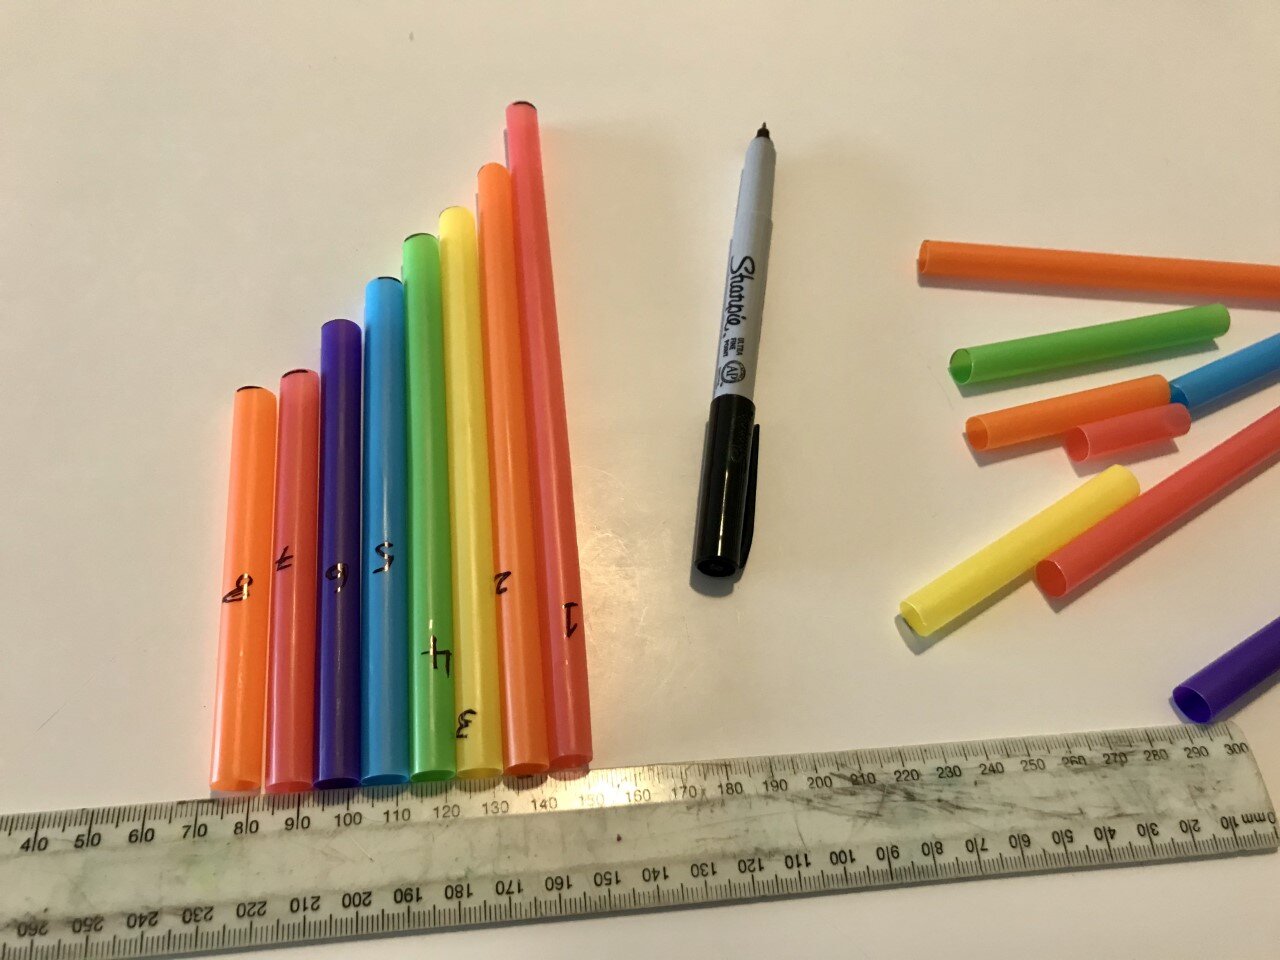
Arrange all the straws in order, longest to shortest, with the tops of them all at the same level.
Number the straws with a maker 1 through 8, with number 1 being the longest straw.
Place the spacers in between the numbered straws, this will make it easier for you to blow into one straw at a time for different individual notes.

Tape the straws spacers tightly together in a long row.

Test your pan pipes by blowing the numbered straws in this order:
333 333 35123 444 4433 3355421
Can you recognize the song?
Explanation:
What is sound?
Sound is a series of waves that travel through the air and are interpreted by our ears and brain.
Why do we hear sound when we blow into this flute?
The pan flute is an end-blown flute. Sound is produced by the vibration of an air stream blowing across an open hole at the end of the tube. The air moves through the straw, vibrating along the way and out to the end.
Why do we hear different sounds?
This is what we call pitch. The pitch of a music note is determined by its sound wavelength. Each straw is producing a music note of different pitch in a musical scale called an octave. The wavelength that can be played depends on the length of the instrument.
Take it Further:
What are other instruments that use air to create sound? Investigate other instruments where the musician blows into them to make a sound. Do they work in the same way? Organs, woodwinds and brass instruments all have similar principles.
Investigate the history of panpipes. Throughout history, many cultures had enjoyed the music from panpipes. What stories can you find about these interesting instruments.
Loving this content? Make a donation to the Saskatchewan Science Centre!
#letssciencethis #SaskScienceCentre #AtHomeWithCASC #ScienceChampions #ScienceAtHome #realsciencerealfun

Fractals: Math is Written in the Leaves
Find math in fractals that are in leaves and many other natural elements. A fractal is a never-ending geometric pattern.
We often don’t think about math when we see a leaf from a tree. However, we can see math in fractals found in leaves and many other natural elements. A fractal is a never-ending geometric pattern. In a fractal, a pattern is repeated in the same way, appearing as smaller and smaller versions.
What you need:
Paper
Crayons or pastels
Pencil
Any leaf of your choice
What you do:
Begin by taking a walk outside in nature. Find a few leaves that have fallen. Look for a few leaves from different types of trees if you can, so that you have leaves of different shapes and colors.

Make observations. Pick one of the leaves and look it over carefully, observe the lines or veins in the leaf. Locate the vein in the middle of the leaf paying attention to how it divides the leaf in half.

Now look for the veins that branch off from the centre. Do you see the way the veins branch off into tinier branches? Those branch-offs are called fractals.

Now look a bit closer at the first level of fractals. Do you see veins that break off into a second level of fractals? There are probably a lot of these. Can you see a difference in the veins?
If you observe even closer, do you see more veins? There is a third level of fractals that are even smaller. How many levels can you see?
Create your Own Fractals
Trace the leaf on to a piece of paper using a pencil. If the leaf is small, try drawing a larger scale version of the leaf. Make the edges, points and curves of the outside of the leaf.

Inside the leaf, draw the centre line using the crayons or pastels. Look at your leaf again and start to add the first level of fractals to your leaf. Extend these fractals from the centre line. Continue to add fractals, branching off the veins. There may be too many to capture in your drawing but add as many as you can.
Use different colors to make each fractal level. If using pastels, try smudging the lines to create an interesting effect.

Explanation:
Fractals occur in many places in nature. For example, the tree from which the leaf fell is full of fractals. If you look at a tree, you will see a shape the looks like a Y. This simple shape repeats itself within a branch, into another branch, and into the full shape of the tree.

Fractals are not only a series of lines but also any shape or object that repeats. The shape is made of smaller versions of itself, breaking apart into smaller and smaller versions of the same shape.
Where else do we see branching fractals in the world around us? Lightning is an excellent example of fractal. Each bolt branches out making a pattern as it goes toward the ground.
What about on our bodies? Our lungs are a good example of fractals. The blood vessels in your lungs are similar to those branching Y shapes you saw in the tree.
Take it Further:
Fractal geometry is an important branch of mathematics. It has connections to many different types of sciences and math, including computer graphics. When on your nature walk, look at structures made by humans, do you see any fractals?
Fractals are also used in art. Jackson Pollock used fractal to create some of his most famous art work. Find images of some of his work and see if you can find the fractals. You can also try to make your own Pollock fractal paintings.
Loving this content? Make a donation to the Saskatchewan Science Centre!
#letssciencethis #SaskScienceCentre #AtHomeWithCASC #ScienceChampions #ScienceAtHome #realsciencerealfun
Lunar Lander Challenge Activity
Explore the lunar surface in the Lunar Lander Challenge. Get ready for your own mission to the Moon. Build a Lunar Lander and test it out with this weeks Science at Home Challenge.
Explore the surface of the Moon by making a lunar lander that will allow an astronaut to survive a touchdown on this harsh landscape. Even though the Moon is the closest object to Earth, its surface is vastly different with no water or wind on the hard and rocky surface.
What you need:
Paper cup
Paper (newspaper, construction paper, and/or tissue paper)
Plastic bag
Popsicle sticks
Tape
Scissors
Astronaut (made with ping pong ball, pom pom, marshmallow, or small toy)

Background:
The surface of the Moon is rough, barren, and covered in fine dust. There are no soil bacteria to break down organic material, no wind to erode rocks, and no tectonic activity to make changes to the surface of the Moon.
Imagine a group of astronauts in orbit around the Moon. They are trying to land their lunar lander on the surface of the Moon. However, something went wrong with their landing gear. They ask the ground crew back on Earth what to do. You are part of the team on Earth, with only basic supplies, you need to find a way to fix the lunar lander and help the astronauts land on the surface of the Moon.
What you do:
Build a model of a lunar lander that can softly land on the Moon making sure to keep the astronauts safe in the cabin. You only have a limited amount of supplies since the astronauts in this scenario would only have limited supplies.
The astronauts can be either a ping pong ball, pom pom, marshmallow, or other small toy. Use the paper cup for the cabin where the astronauts will sit.
How will the astronauts stay in the cup? What can you create to protect it from the fall? Remember the astronauts will need to get out of the cabin so you can’t tape it inside.
How will the lunar lander absorb the impact? What shock absorption could you create? Try folding paper in an accordion to create a spring that absorbs the shock.
Is there a way to slow the descent of the lunar lander? Keep in mind, there is no wind on the Moon.
The surface of the Moon is soft, covered by dust that doesn’t move around. How might this be an advantage or a disadvantage? If the dust layer is soft, it would help cushion a landing. However, if it is too soft, the lander could sink into it and get stuck.
Use as few supplies as possible. Challenge yourself to use the least amount of supplies. Can you build a Lunar Lander with only three of the supplies?

Test out your lunar lander. Place your astronaut into the cabin and drop it to the ground. Did the astronaut stay in the cup? How high did it drop from? Test again from a higher place.
Test the lunar lander on different surfaces. The surface of the Moon is uneven and covered by a soft layer of dust. See if your model will land in a location that has uneven ground such as grass, carpet, sand, or rocks.
Imagine the scenario the astronauts are faced with. How would they build the model you are suggesting? What equipment or supplies would be needed to do so?
Explanation:
Because Moon has a very thin atmosphere and lacks wind, the surface of the Moon rarely changes. We can see a history of millions of years of meteors bombarding the surface. Landing on the Moon can be tricky. Spacecrafts need to slow down in order to land gently and keep those on board safe.
On the Apollo missions, the Lunar Roving Vehicle (LRV) was used. This electric vehicle was designed to operate in the low-gravity vacuum of the Moon and was capable of moving across the lunar surface. The Apollo astronauts did a range of explorations on the lunar surface. Three LRVs were driven on the Moon, Apollo 15, 16, and 17. The furthest distance travelled by an LRV was by Apollo 17, which travelled 35.9 km in 4 hours 26 minutes. The Lunar Roving Vehicle that weighed about 210 kg could hold an extra 490 kg on the lunar surface. This extra capacity was designed to hold the weight of the astronauts, their equipment and the rock samples they collected.
Take it further:
After you have done this activity, try out one from the Canada Space Agency Junior Astronaut program. In Survivor Moon you will need to pick which supplies are the most important for your team to take on a trek across the Moon.
Tips and Tricks:
Encourage questions, imagination, and exploration. If an idea seems impossible, let your children explore the idea safely and let them explore solutions even if they do not work. To prevent frustration and encourage overcoming challenges, ask prompting questions such as ‘how can this be changed to have a different outcome?’.
Find footage from the first space walk and show it to your children. Or, reach out to older members of your family and ask, “where were you when the first astronaut walked on the Moon?”
Make it more of a challenge by making all the supplies a mystery. Place three of the building supplies into a paper bag and only allow for the materials in the bag to be used. This is a way to encourage critical thinking and innovation.
Loving this content? Make a donation to the Saskatchewan Science Centre!
#letssciencethis #SaskScienceCentre #AtHomeWithCASC #ScienceChampions #ScienceAtHome #realsciencerealfun
Shadow Exploration Challenge Activity
Creating shadows can be a fun way to explore light. Using both natural and artificial light, explore how you can create shadows.
Creating shadows can be a fun way to explore light. When sunlight travels to the earth and is blocked by an opaque object, the light can travel through it, creating a shadow. Using both natural and artificial light, explore how you can create shadows.
Indoor Shadow Exploration
Story telling with shadow puppetry is an ancient form of entertainment which uses flat articulated figures as puppets which are held between a source of light and a translucent screen. It uses shadow, the space where light from a source is blocked to change different characteristics of the puppets. China, France, India, Turkey, Thailand, and many more countries have a long history of using shadow puppetry as art and entertainment.
What you need:
Dark paper
Bright light (flashlight, flood lights, lamp, or outdoor solar light)
White tissue paper or wax paper (or a thin white sheet)
Cardboard box
Sticks (for example, skewers, chop sticks, pencils, drinking straws)
Tape
Scissors
Knife to cut cardboard
What you do:
Start by building a screen. Find the side of the box that is flat, this will be the front of the screen.
Draw a rectangle on the front of the box, leaving a 5 cm border all round.
Cut out a piece of tissue paper or wax paper that will fit on the side of the frame. Tape it into the inside of the box.
Cut the remaining sides of the box, leaving the side flaps of the frame so it will stand up on its own. The shape of the box should be like a trifold presentation board.
Build puppets using dark paper cut out shapes, figures, and objects. Use tape to attach a stick to the back of each puppet.

6. Shine the light from lamp or flashlight. Place the puppets between the light and the screen.


7. Be creative. Try adding other objects instead of paper puppets. You can even play a guessing game by placing mystery objects behind the screen and asking someone guess what it is. Try using toys or objects that have spaces such as a colander or wire baskets.
Can you make shadows with your hands? Shadowgraphy is the art of preforming using the images of hand shadows.
Outdoor Exploration
On a sunny day, go outside to explore shadows in the sun.
What you need:
Chalk
Paper tube
Dark paper
Tape
Scissors
What you do:
Explore the sun at different times of the day. Using a fixed object like a building, mark with chalk the movement of the sun at different times on pavement. This is like a sundial and a way you can tell time.

2. Trace your shadow. Using chalk, have someone trace your shadow. Or trace the shadow of different objects. Playing with perspective you can trace an object much bigger than it is.

3.Take your shadow puppets outside. Using the sun as your light, tell a shadow puppet story.
Make your own bat signal!
Design a signal or shape with a white crayon on a piece of dark paper.

2. Cut the paper around the image you want to project. Cut only the negative space or where you want the light to shine.

3. Attach the cut-out signal onto a paper tube using tape.

4. Hold the signal up so that the sun (or flashlight) can create the shape of the signal on the ground.

Explanation
All light, even sunlight, travels in waves and if something blocks the path of these waves, a shadow will be formed. The closer an object is to the light source the bigger its shadow will be. But which objects block light? Objects that are opaque don’t let the light pass though and create shadows. Objects that are translucent allow some light to pass through, but it can scatter and change the light.
The sun will give objects the longest shadow at the beginning and end of the day, because that is when the sun is lowest in the sky. The shortest shadow cast using sunlight would be in mid-day because that is when the sun is highest in the sky. At mid-day the sun is directly above us and the light rays are coming almost straight down so the shadows our bodies create are short and squat. This happens because we are blocking the light from hitting directly below us. In the morning and afternoon, the sun is lower in the sky and the light hits us at an angle, which produces long, thin shadows.
Warning: never look directly at the sun. Observe the sun through shadows.
Tips & Tricks:
Invite your children to explore shadows with different movements especially while outside in the sunlight. Find objects that move like garden pinwheels and explore what movement does to a shadow.
Storytelling is a way to expand the play. Use characters from other stories or create new ones.
As an addition to the indoor shadow play, try using different types of light. From LED to incandescent flashlight to a candle. Each form of light has different wave lengths changing how the shadow will appear.
Loving this content? Make a donation to the Saskatchewan Science Centre!
#letssciencethis #SaskScienceCentre #AtHomeWithCASC #ScienceChampions #ScienceAtHome #realsciencerealfun
Soap Boats Challenge Activity
It is all about surface tension with this soapy activity. Make a boat and watch it as it zooms around using the power of soap!
It is all about surface tension with this soapy activity. Make a boat and watch it as it zooms around using the power of soap!
What you need:
• Cardboard (from a cereal box or other thin cardboard)
• Liquid soap
• Pipette, eye dropper, syringe, or small measuring spoon
• Scissors
• Large tub of water
• Decorations (markers, paint, stickers, etc.)
What you do:
1. Find a piece of cardboard from a cereal box or other light cardboard. Draw a rectangle that has a point at one end. Think of a rectangle with a triangle on top. This will be the body of your boat.
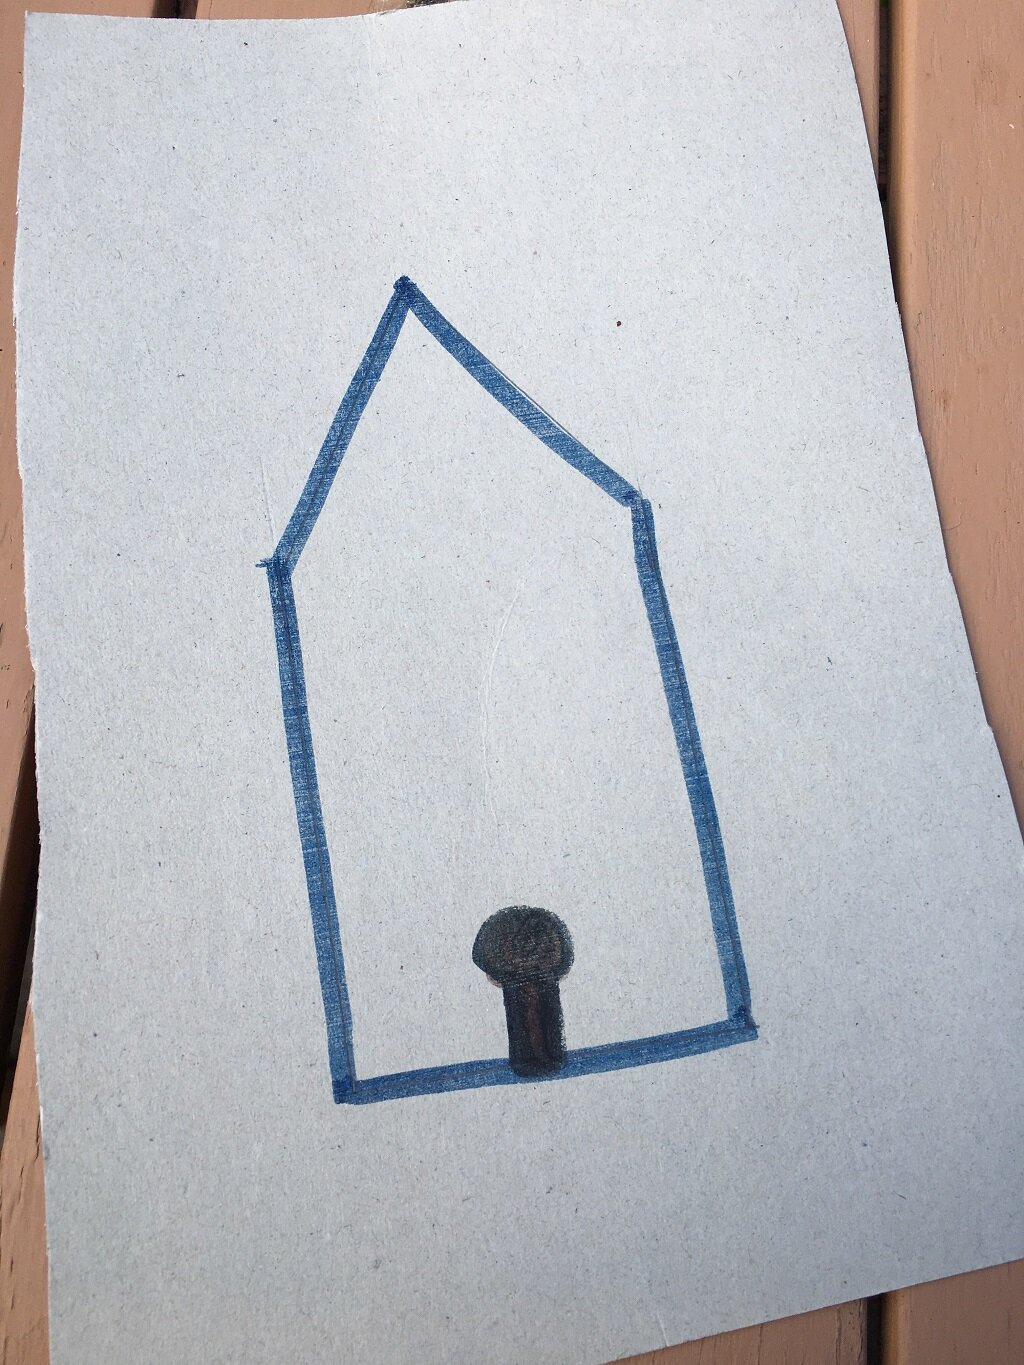
2. Cut out the boat. On the flat end, opposite to the pointed end and make a narrow slit with a small hole at the end.

3. If you would like to add some special flare to your boat, decorate it with markers and stickers.
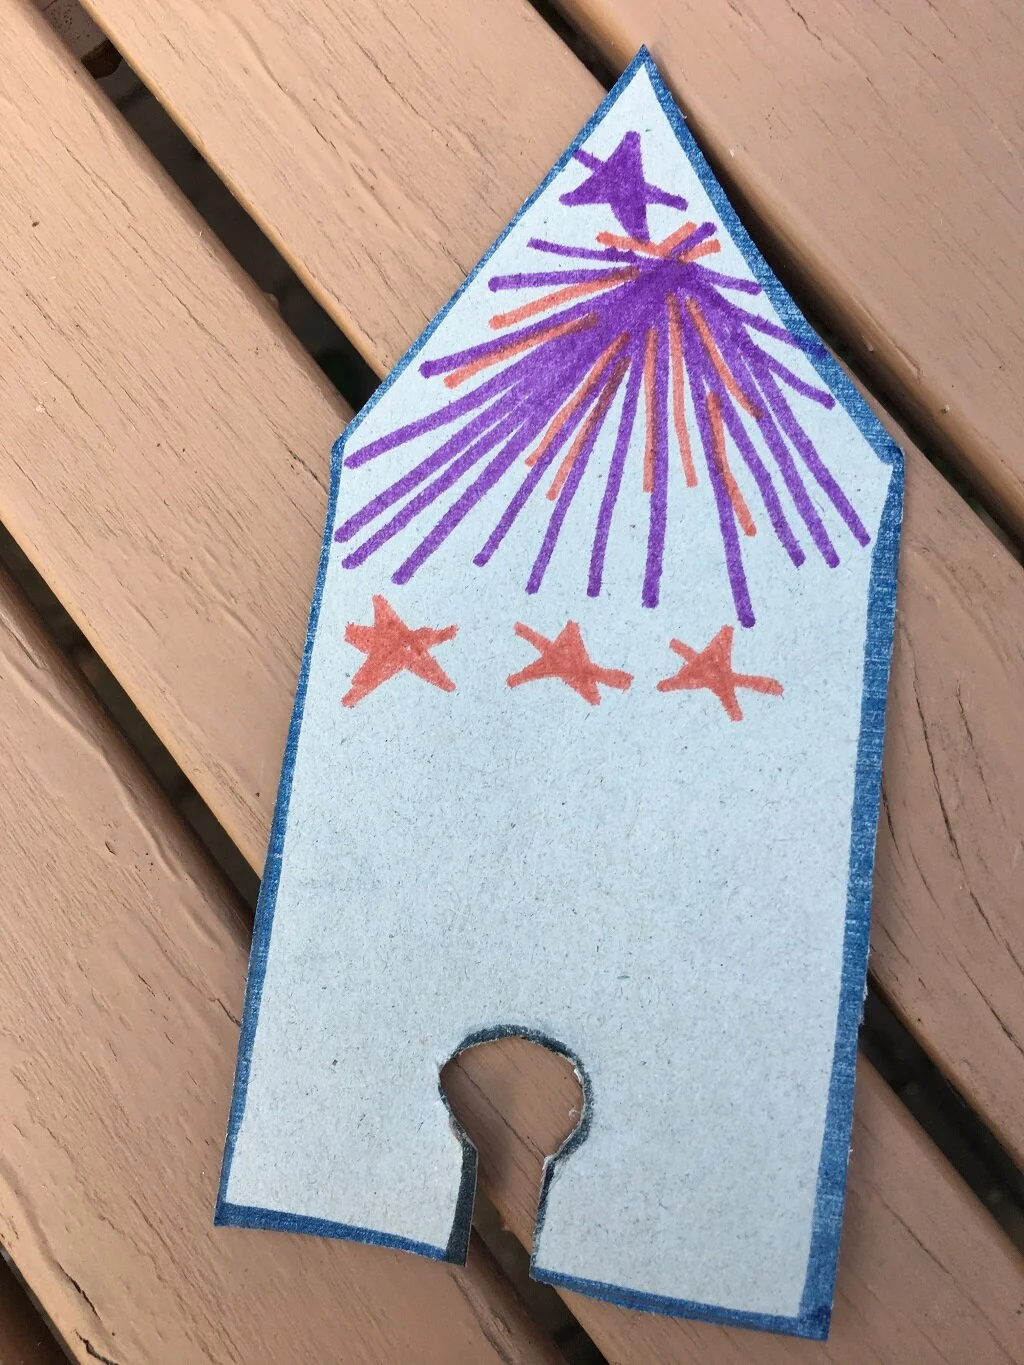
4. To make your boat travel in water, fill a large tub of water with about 10 cm of water. Try this part outside!

5. Place the boat into the tub of water. With the pipette or small spoon drop one small drop of soap in the small opening of the boat.
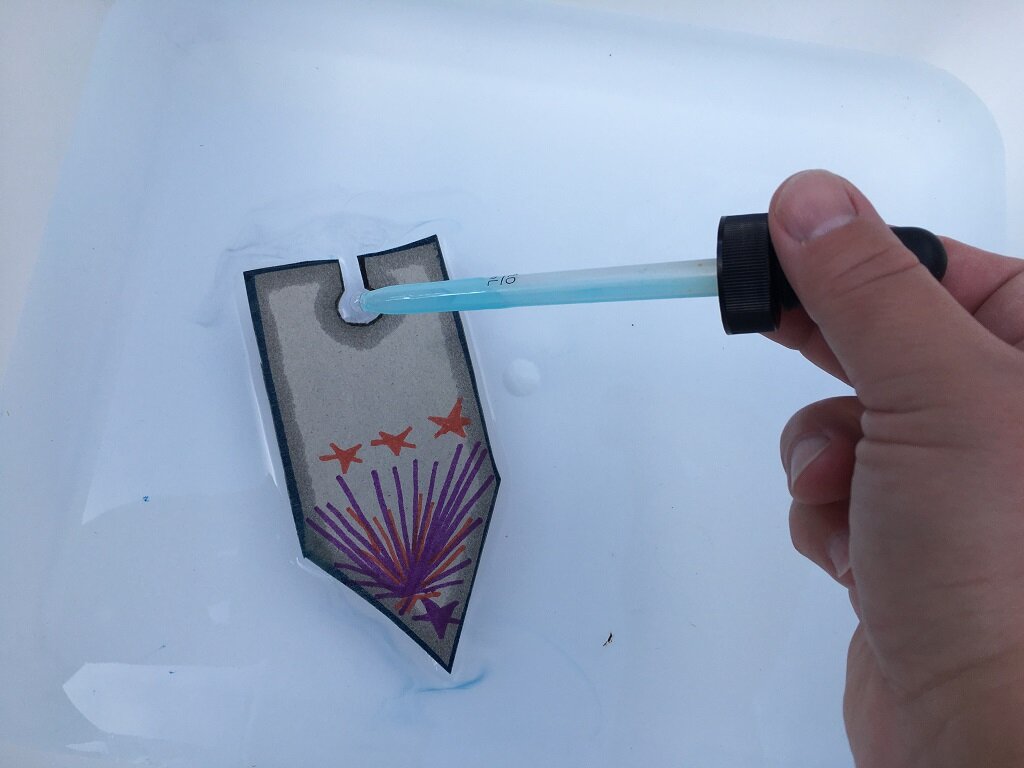
6. What did you see happen? Watch the boat zoom on the surface of the water. Friendly tip: You must use fresh water every time you add soap to the tub therefore only use a small amount of water in the tube.
Explanation:
Did you see the boat move? In this activity you saw surface tension in action! Surface tension relates to a few properties of liquid, in this case water. Water molecules work together (or cohesively) at the surface; therefore, it makes it possible for it to resist another force. If you have a glass of water, the molecules on the surface of the glass do not have water molecules on all sides like they would on the inside of the glass. So, the water molecules join more strongly to those beside them and below, but not above.
With soap boats, you observe the molecules on the surface of water are very close together, when the soap is added it loosens the bonds of the water molecules. When the soap touches the surface of the water it breaks the tension by moving the molecules away from each other. Then other water molecules from lower in the tub move up to fill the spaces to make tension again. The boat moves and will continue to move until the soap has reached the entire surface of the water. For this reason, you must change the water each time.
Taking it further:
Think about the surface of water. Observe it by looking closely at the surface before you add the boat and after. When the soap was added, did it change how the surface of the water looked?
What are examples of surface tension in nature? Observe a body of water such as a lake or pond, to find water bugs. Watch as some insects can land on the surface of water without sinking into it.
Try another experiment with surface tension. With a pipette, add one drop of water onto a coin like a penny. How many drops of water can you add before it spills over the sides of the coin?
Loving this content? Make a donation to the Saskatchewan Science Centre!
#letssciencethis #SaskScienceCentre #AtHomeWithCASC #ScienceChampions #ScienceAtHome #realsciencerealfun